Setup Django on WebhostPython
Deploying a Django application on WebhostPython.com may be a bit of a challenge for non-professionals. The upside of this hosting service is that it is easy-to-join, very competitively priced and technically sound. The downside is that the documentation is somewhat outdated and not very complete. The helpdesk, however, is friendly, fast and professional. With some assitance, deploying my first django app was not too difficult, although it did take a bit more than a single click. Here is the procedure to get everything up and running.
Before starting
Make sure to have access to an account through cPanel (https://<your_domain>/cpanel) and ssh (e.g. with PuTTY or SmarTTY). To access cPanel use login credentials as provided; to access ssh use port 2223. Be aware that more than 5 failed ssh-logins within the hour will lock your ip-address out of the service. You will need the helpdesk to unlock.
Topics
Setup Virtual Environment
Setup Django Project
Adjust files
Templates and static files
Connect to MySql database (external)
Setup Virtual Environment
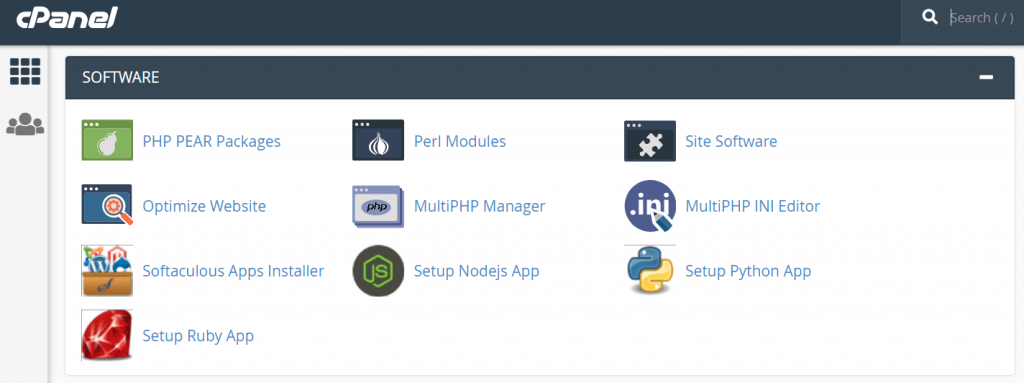
In cPanel scroll down to the software section and open the Setup Pyhton App.

cPanel – Software section
Setup new application
Select the proper python version, provide a name for the project, select the (sub)domain to launch the application from and click Setup. This is the one click part of the process. It creates the virtual environment for your application.

Setup Puthon App
Activate virtual environment and install Django
The real fun starts in the application that has now been created:

Virtual Environment
This application allows to activate the virtual environment for work in the ssh-console. Copy the string indicated as “Command for entering to virtual environment” into the “Execute command” entry box and click Run. If all is well, the (sub)domain will provide the message: “It works! Python [version].”
After activating the virtual environment, on first launch only, the django module needs to be installed. Adding additional modules is optional. Further module can be added later on. My initial setup requires:
> pip install --upgrade pip
> pip install django
> pip install mysqlclient
Setup Django project
Create a Django project in the ssh-console
In the ssh-console the subdirectories “my_app” (or whatever the project name is) and “virtualenv” have been created by the Setup Python App. To start a Django project cd into my_app and call django-admin, with an explicit reference to the virtual environment path:
~$ cd my_app
~/my_app$ ../virtualenv/my_django/3.6/bin/django-admin startproject my_app .
It may be confusing that I use my_app both for the outer level virtual environment and for the inner level of the Django project, but for me this works fine. But don’t forget the dot; otherwise another level of my_app will be added.
Adjust files
Further file adjustments can now be made with the assitance of an ftp-manager, such as FileZilla, or with the filemanager in cPanel, although the latter works a bit more circumstantial. Two files need adjustment: passenger_wsgi.py in the upper level project directory and settings.py in the inner level my_app directory. passenger_wsgi.py should read:
import imp
import os
import sys

sys.path.insert(0, os.path.dirname(__file__))

wsgi = imp.load_source('wsgi', 'my_app/wsgi.py')
application = wsgi.application
In setting.py the ALLOWED_HOSTS setting needs adjustment. DEBUG = True can be left as it is for now, but in production it should, of course, be set to False, to prevent exposure of secure information. In the ALLOWED_HOSTS setting I include both my external and my local server.
# SECURITY WARNING: don't run with debug turned on in production!
DEBUG = True

ALLOWED_HOSTS = ['[my_(sub)domain].com', '[my_(sub)domain].com',
                 '127.0.0.1:8000', '127.0.0.1']
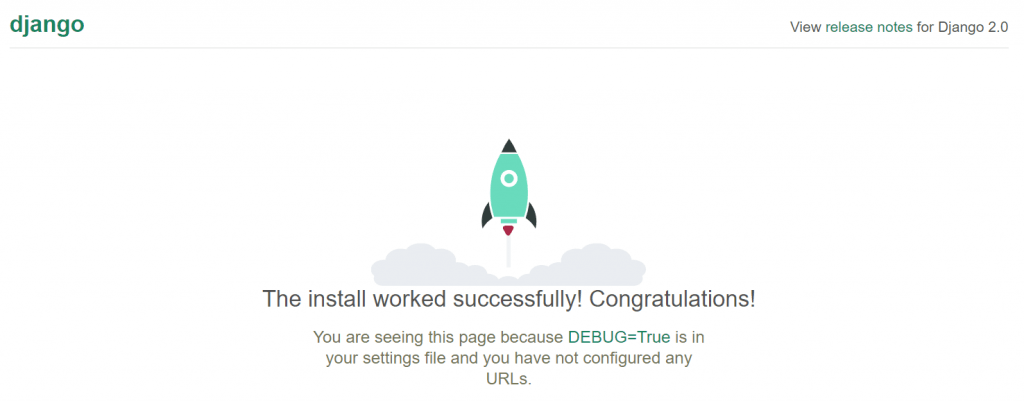
Now, there is a bare Django application in the (sub)domain:

Templates and static files
The next step is to create directories for templates and static files. The templates-directory can be createdin the ssh-console in the outer level of my_app, just as usual:
~/my_app$ md templates
The placement of static files is slightly different. These should not be placed in the project directory, but in the (sub)domain directory.
~/my_app$ cd ../[my_(sub)domain].com
~/[my_(sub)domain].com$ md static
Adjustments to settings.py, to include a reference to the templates and static directories, are similar to the local setup (see: Initial Django), despite the different location of static.
Connect to MySql database (external)
The procedure to connect to a MySql database are largey similar to a local setup. The only difference for me was that the static files for admin were lacking (css, fonts, img and js). These files and folders should be placed in [my_(sub)domain].com/static/admin. The folder (119 files in 13 folders) was placed for me by the helpdesk. The folder is open access available in the django-master on GitHub. In the django-master, admin is located in django-master/django/contrib/admin/static. Once you have the folder on your server, you can easily copy it in cPanel, to the location of any new app (although this will not be the latest version of course).
Moving tables into the database
Tables from a local setup can easily be moved to the external server using export and import in phpadmin. After copying model.py and admin.py, makemigrations can be executed in the ssh-console. On migration, however, there will be an error since the tables already exist. The migration should be executed in fake-mode to solve this issue.
~/my_app$ ../virtualenv/my_django/3.6/bin/python manage.py makemigrations
~/my_app$ ../virtualenv/my_django/3.6/bin/python manage.py migrate --fake-initial
The tables will now show up in myapp.com/admin.
That’s it; have fun!
With all files in place, there is a functional Django Deployment Environment. Working with the python interpreter in the ssh-console, will each time require activation of the virtual environment in the Setup Python App, and the virtual environment should always be referenced explicitely. The setup is ready to create apps, adapt views and urls, design models and ultimately build a full-blown website similar to Bitbucket, Instagram, Mozilla Firefox, Pinterest or NASA. Don’t forget to set DEBUG to False in production. And remember, the helpdesk of WebhostPython.com is friendly, fast and professional. I gratefully ackowledge their help.
